Kale Salad

…à la Shawn

I’ve tried a few kale salads in my life, but none quite as good as my Dad’s. He likes to cook (and eat) just as much as I do, and many of the recipes I make are adaptions of things he cooked growing up.

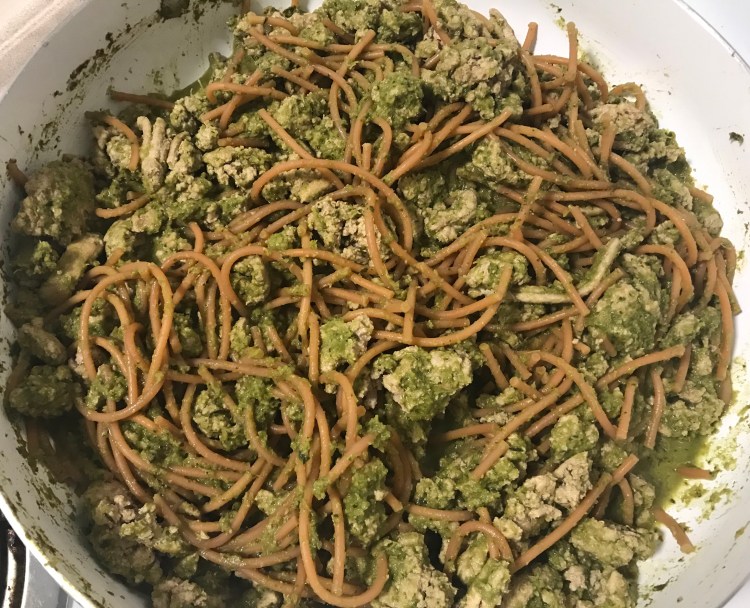
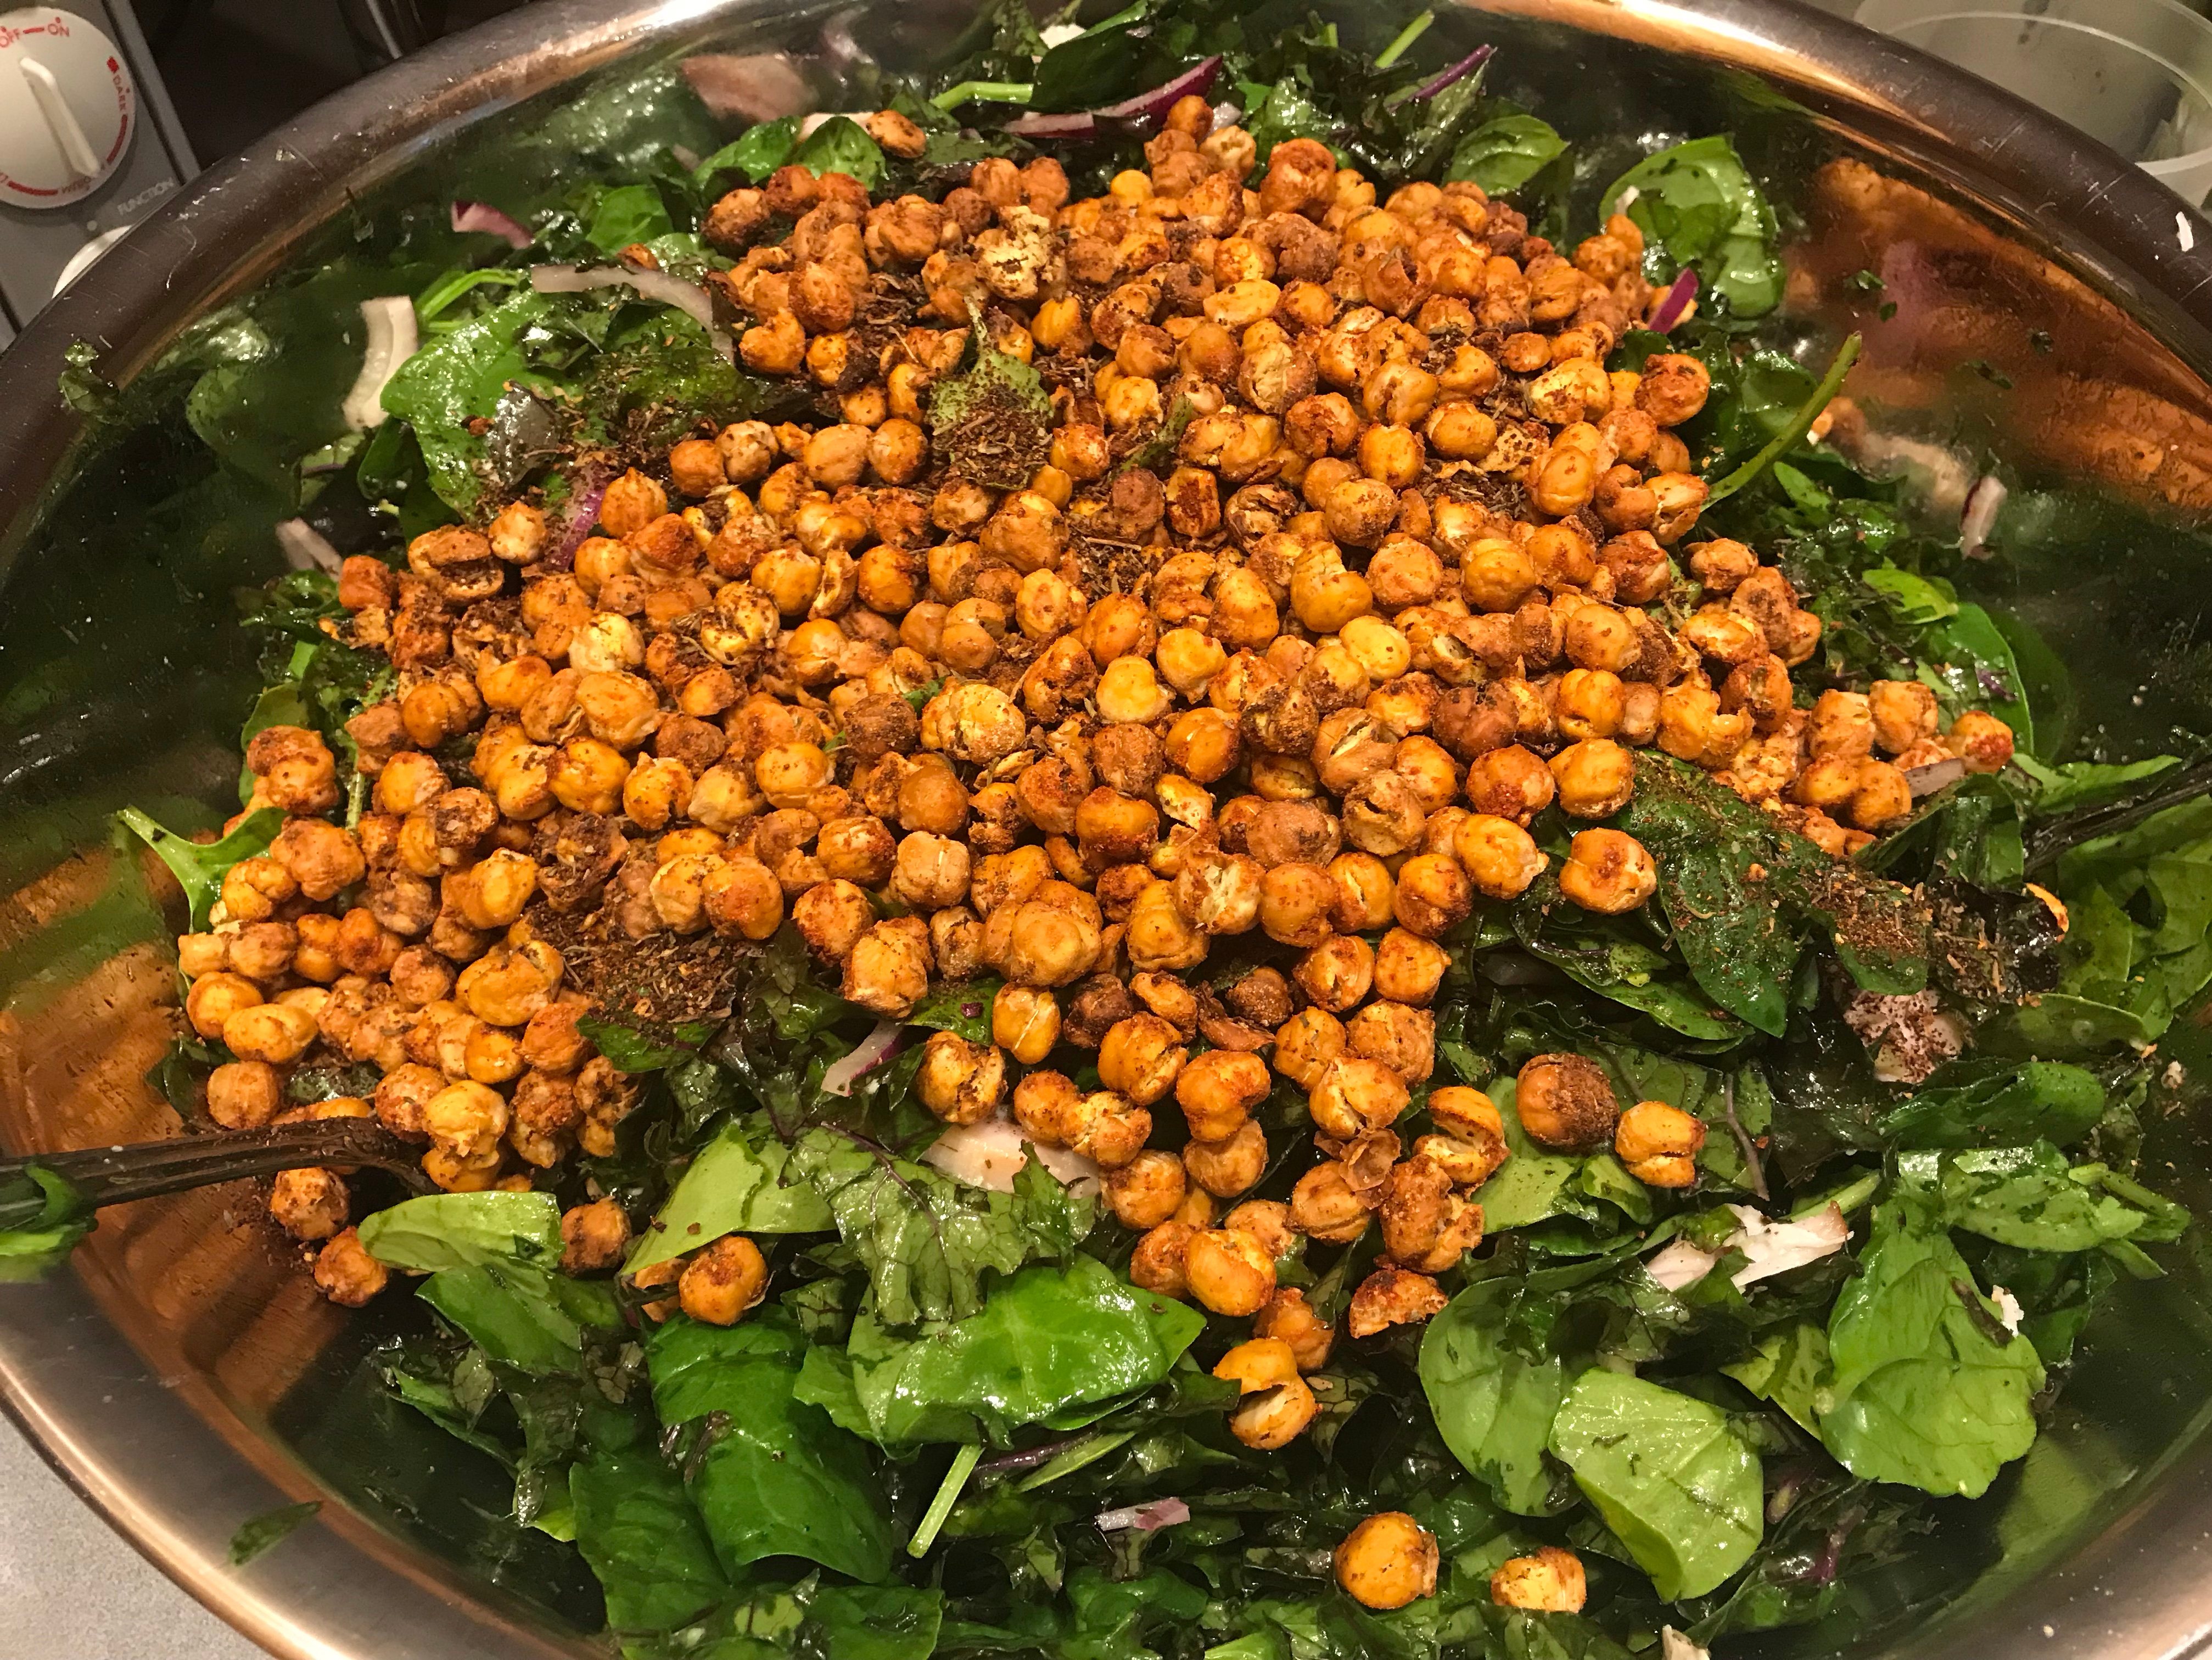
His kale salad may be his most proudest invention yet. What started as a spinach, pea, and feta salad gradually shifted into this red kale, smoked turkey, and roasted chickpea, extremely nutritious meal.

It’s delicious, really. If you don’t like salad because you’re not a fan of greens or tomatoes, then this may change your mind. The smoked turkey and dill seasoning makes it more savory and complex then just a traditional garden salad. It is also a really great dish to bring to a backyard cookout if you’re looking for ideas to impress your guests!

Ingredients:

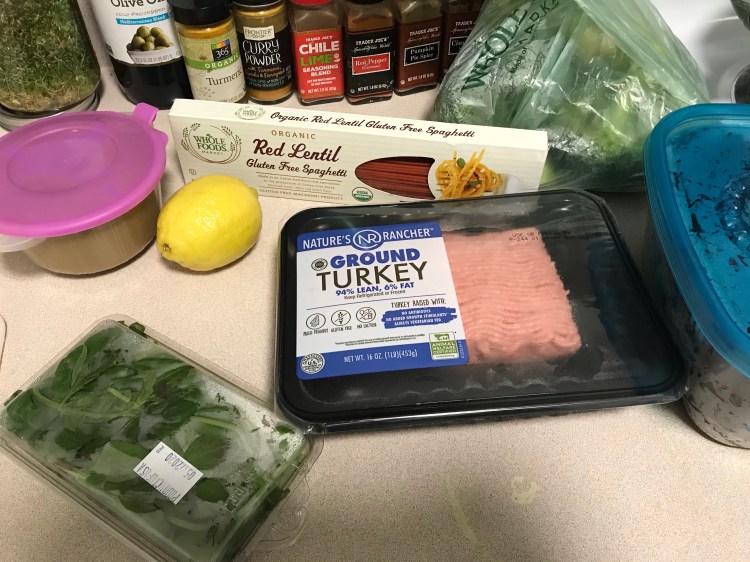
  • Small smoked boneless turkey breast. This item is key because it will change the flavor of the whole salad. We buy our smoked turkey at Whole Foods, but you can also find it at other grocery stores like Market Basket and Wegmans. IT IS NOT LUNCH MEAT. Don’t come back with a pack of smoked turkey deli meat. You can also get a smoked turkey drumstick, which works just as well, but a little more effort to shred.
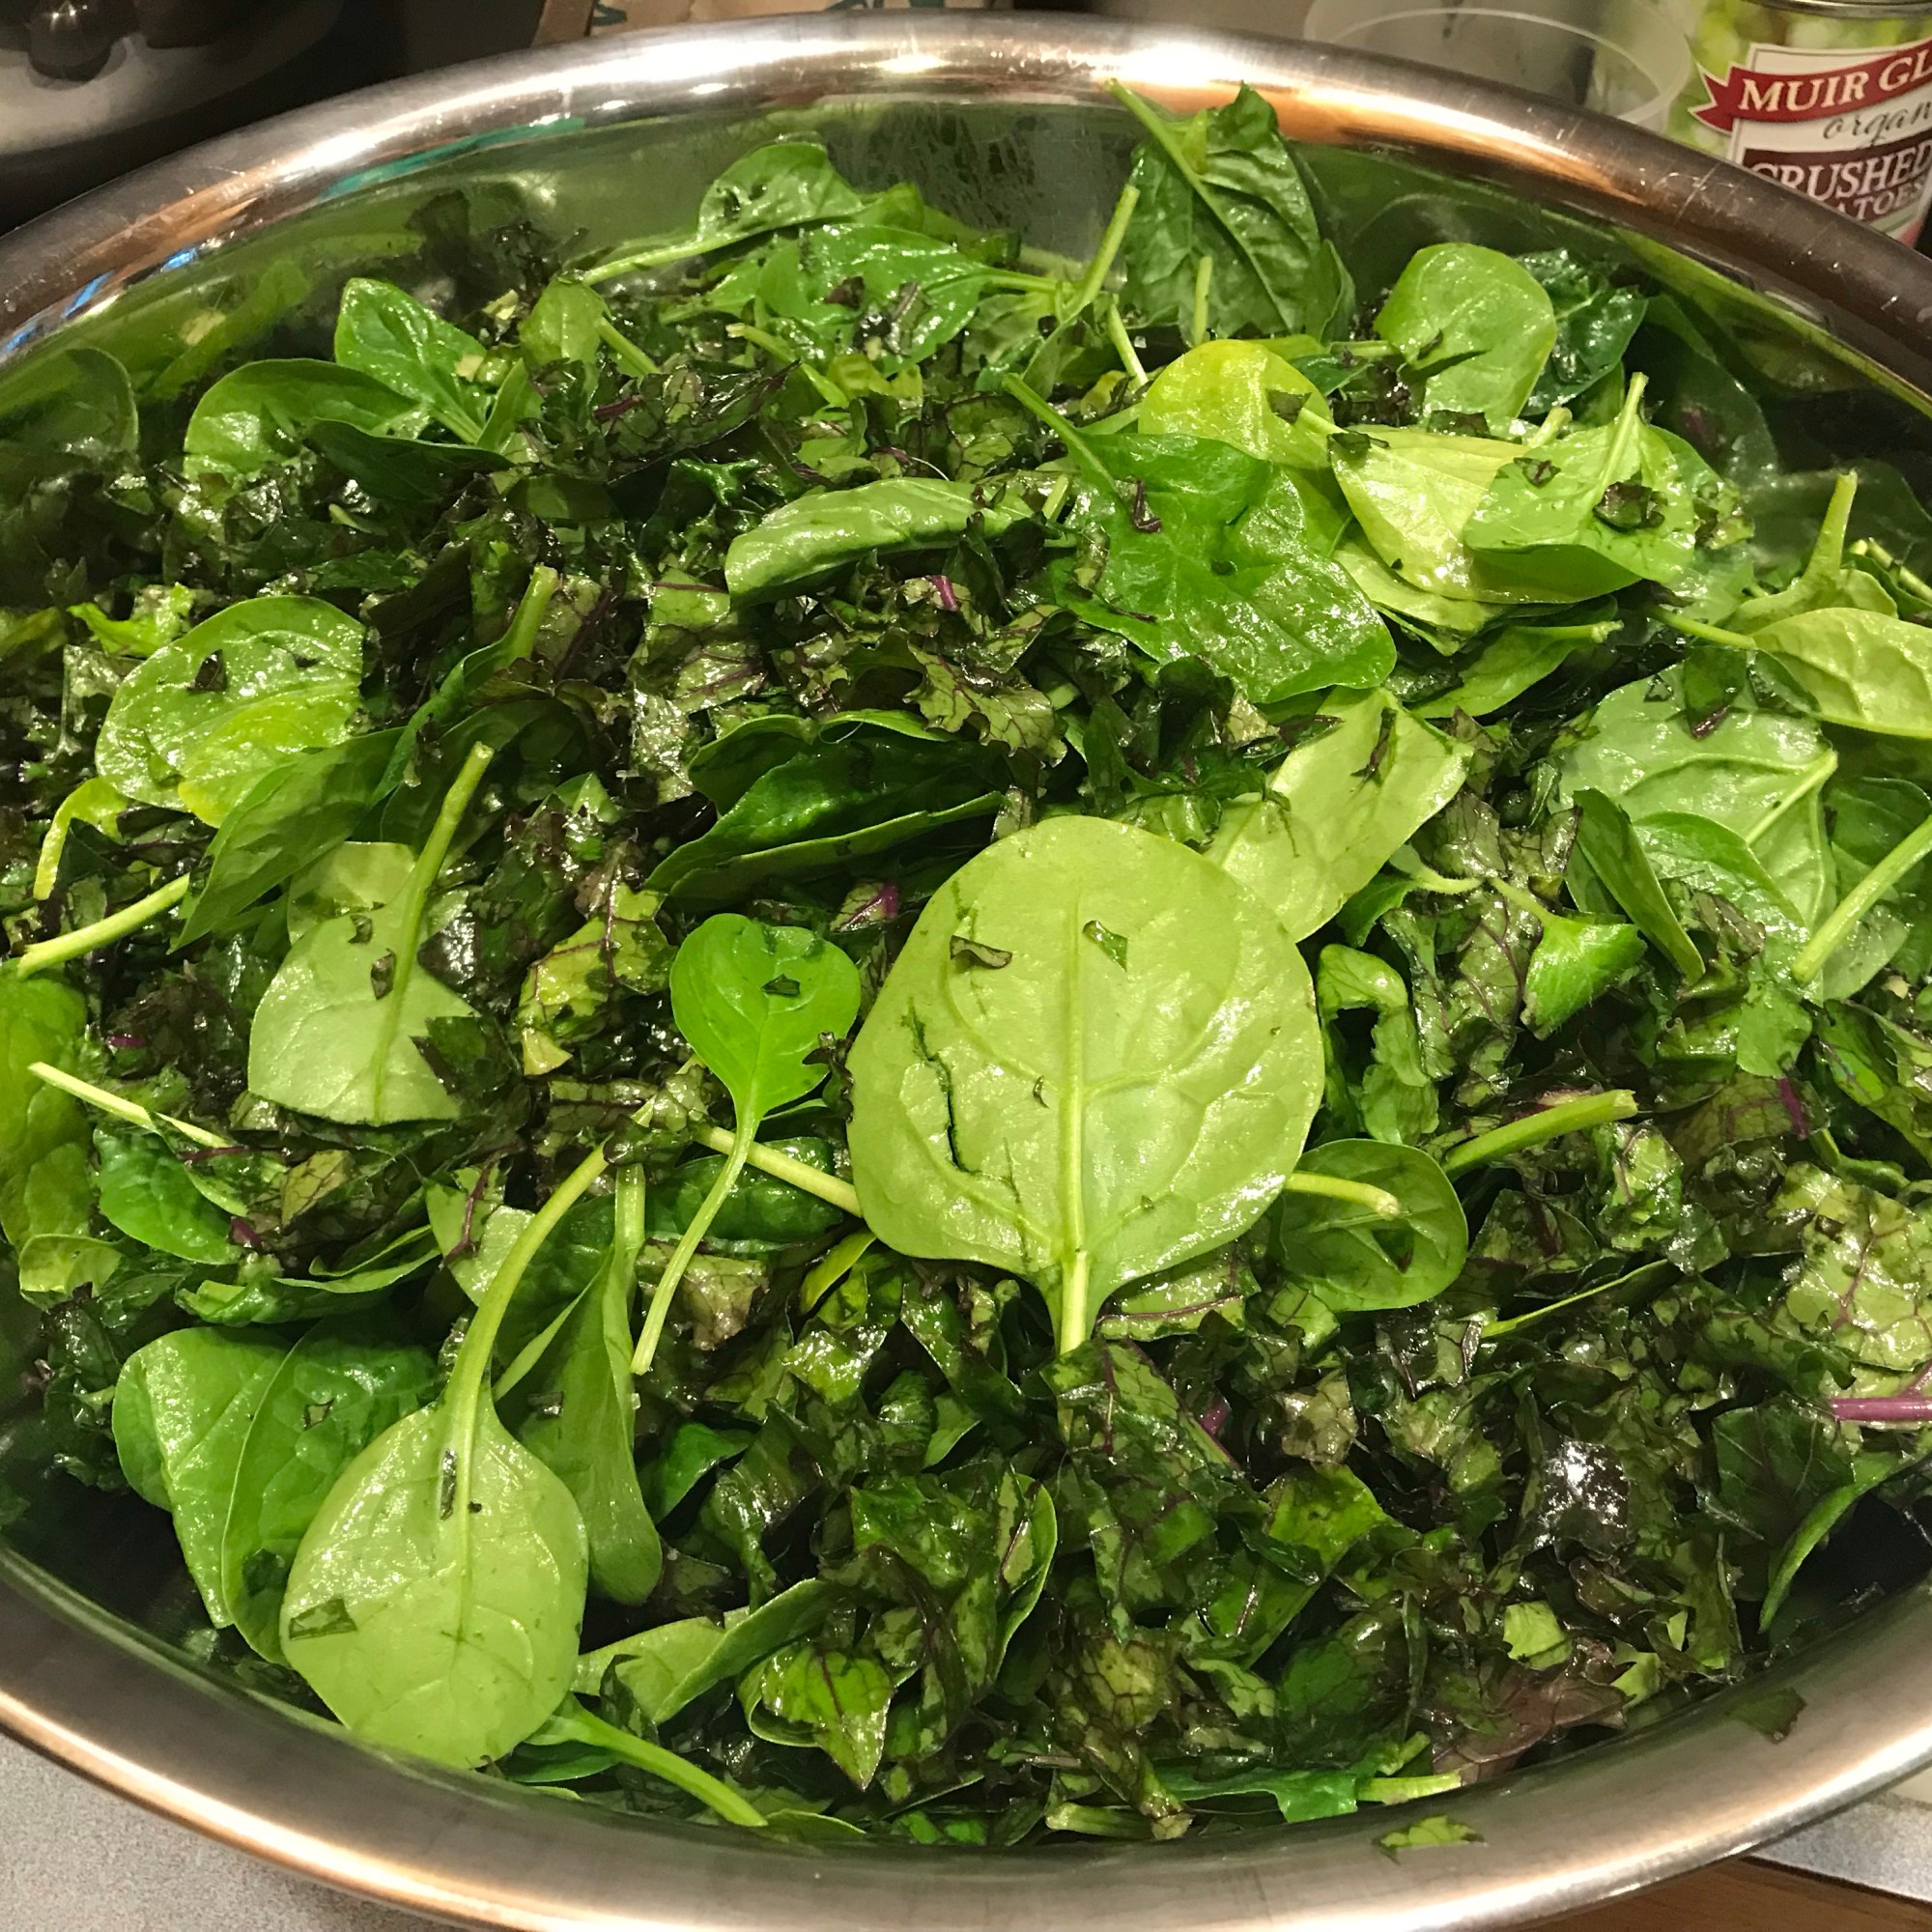
  • Both spinach and red kale are needed for this dish.
    • Spinach – an 8 oz container will be plenty for the salad, especially since the kale is the star of the show
    • Kale – 2-3 heads of raw red kale is what my dad uses, not baby kale. The red kale leaves become very chew-able and crisp when massaged with oil, so don’t worry about it being too rough.
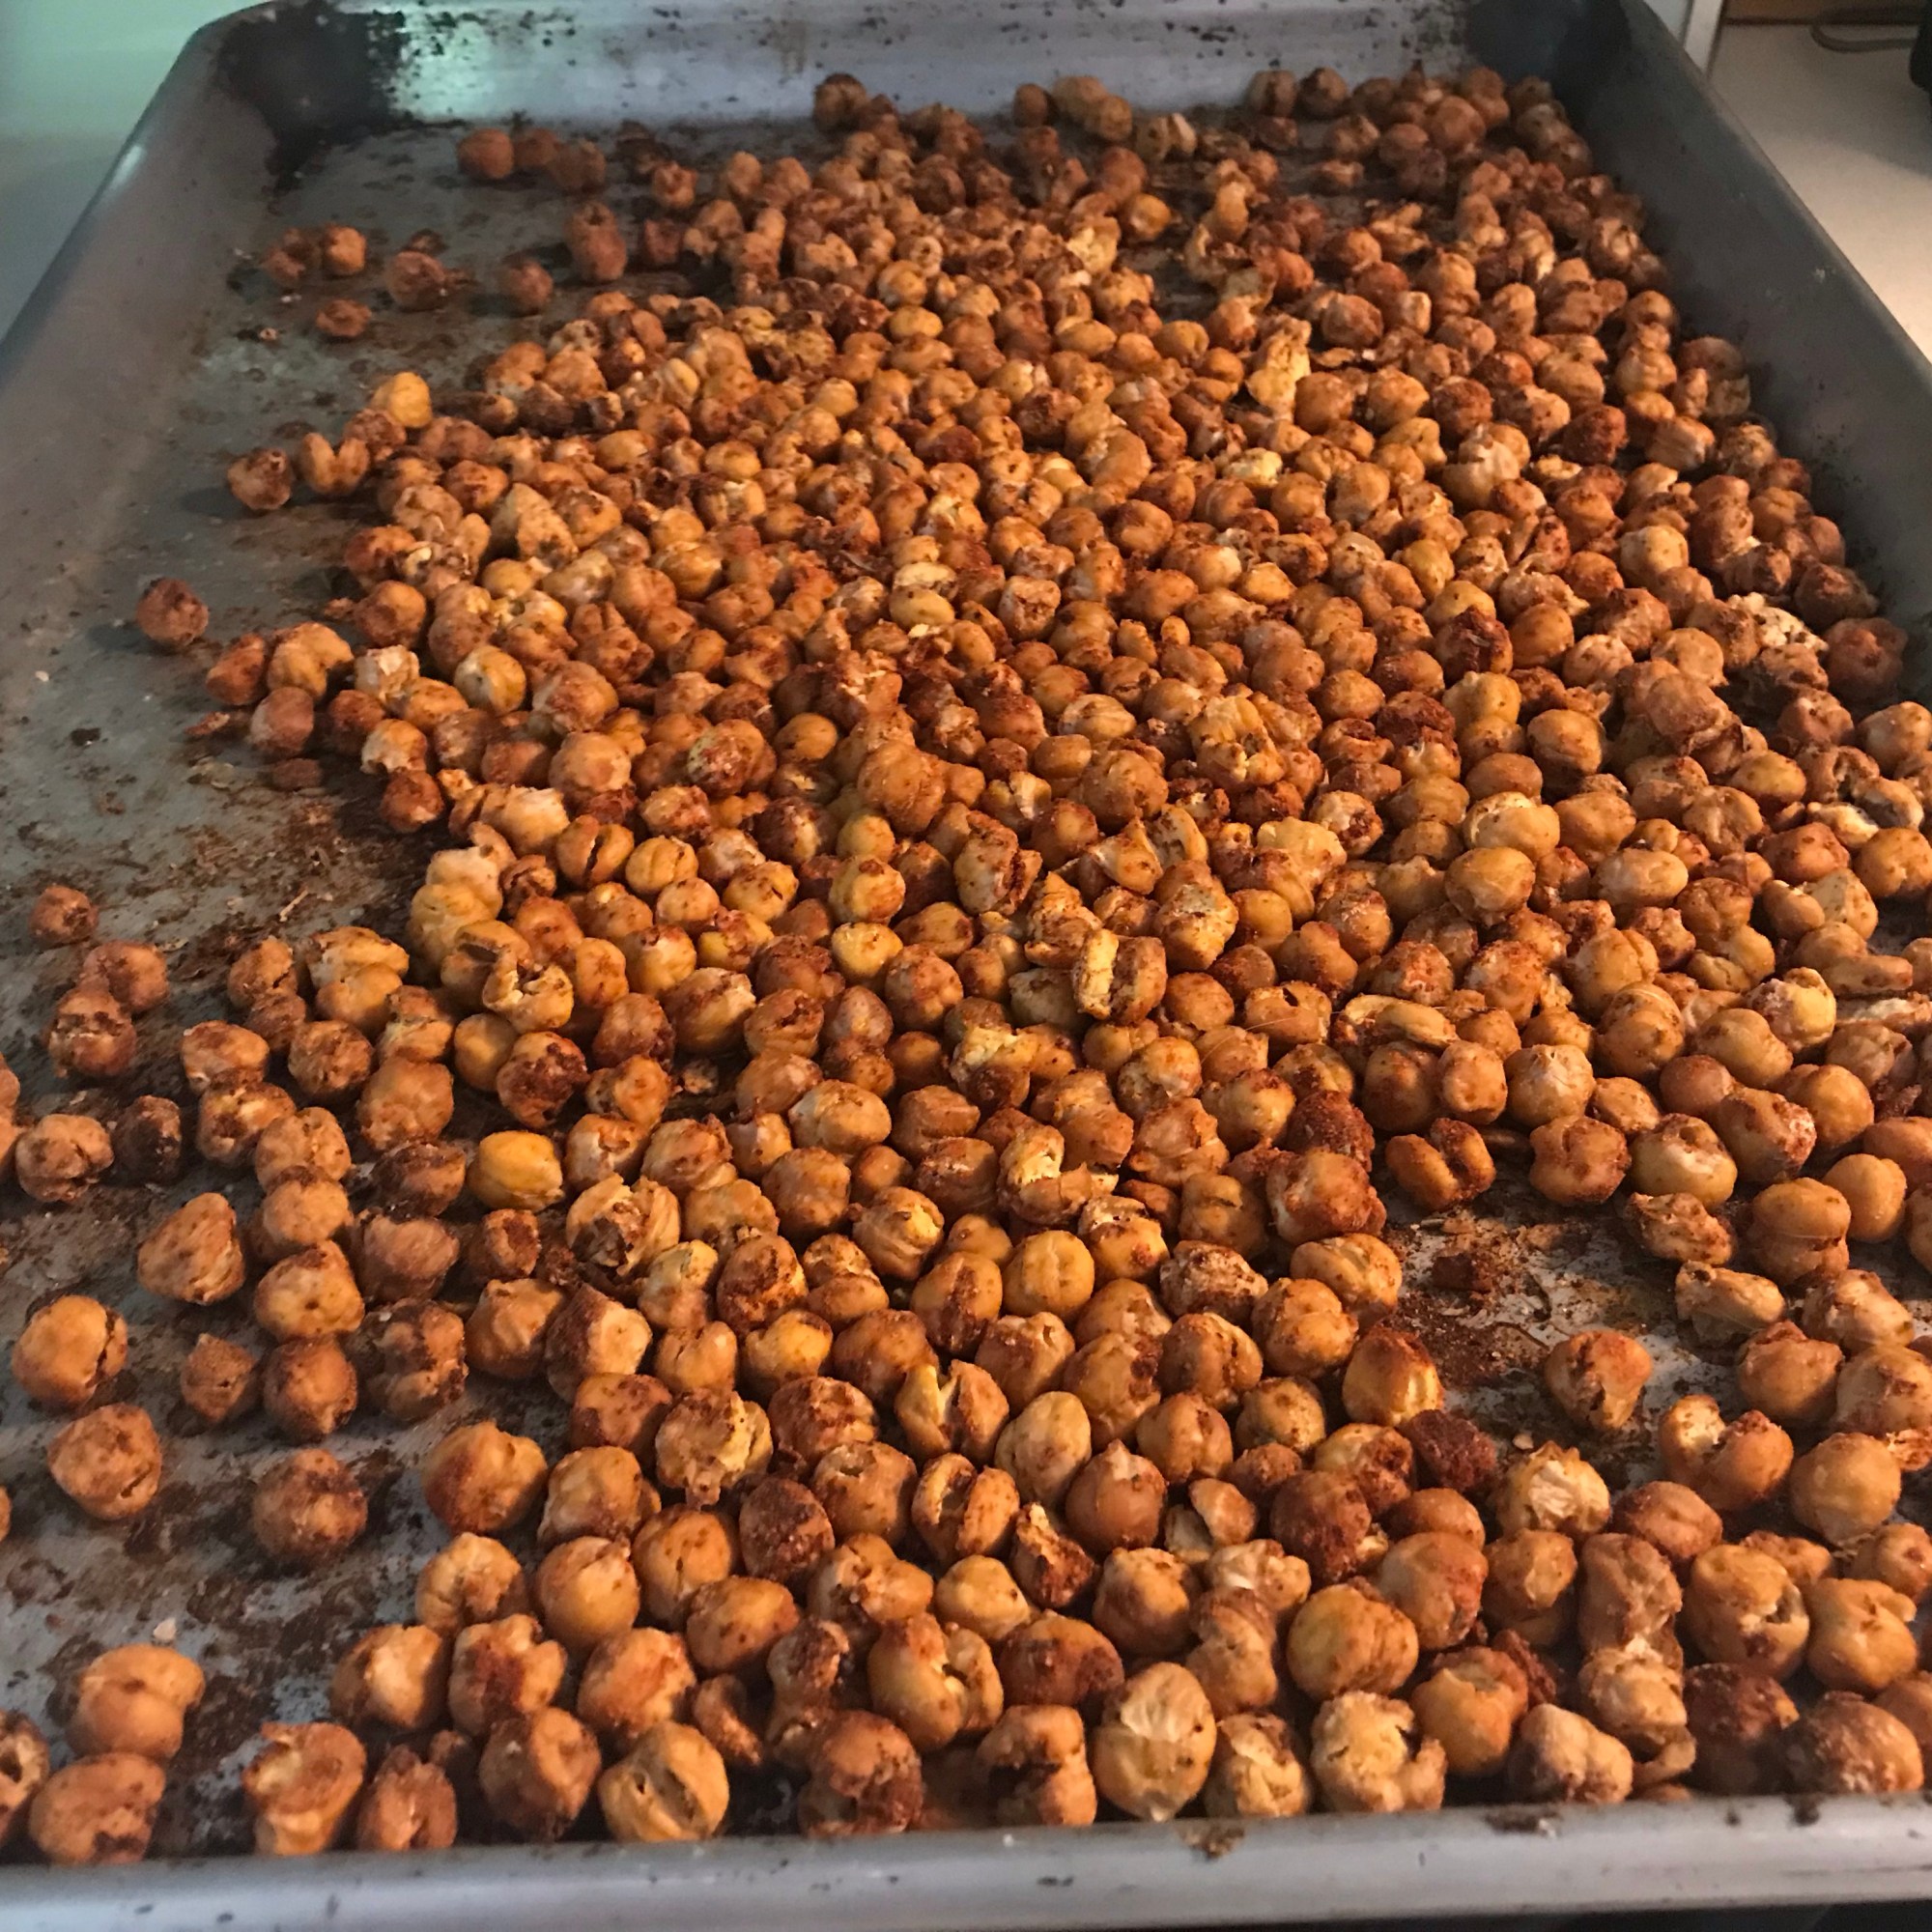
  • 2, 15 oz cans of garbanzo (chickpeas) beans, roasted. You could also do them raw? But really roasted is the best because it adds flavor and crunch to the salad. Like a healthy crouton!
  • A large red onion, sliced
  • 2 limes
Seasonings:
  • Garlic powder
  • Dill
  • Onion powder
  • Kosher salt
  • Smoked paprika

Directions:

  1. Roast your chickpeas. For directions on how to roast chickpeas, see this previous blog post. In the post I describe a few different ways of seasoning the chickpeas, but for this salad, I like to use smoked paprika, salt, pepper, and garlic powder.
  2. Let the chickpeas cool off, either overnight or for a few hours. They will go on last, so you have time to let them sit while you make the rest of the salad.
Prepping the Kale
  • 3. Cut off the bottoms of each kale bunch about 3/4 of the way down.
  • 4. Holding onto the stem, tear the leaves off of each kale stem. Place the leaves into a colander to be washed, and save or throw out the stems (only the leaves are used for this dish, but my family saves the stems and chops them up for other dishes because they’re so healthy).
  • 5. Wash and spin dry the kale leaves.
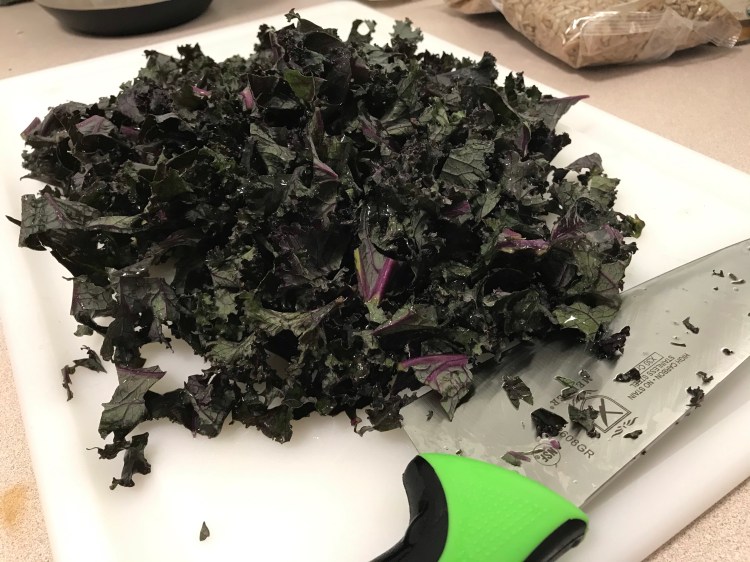
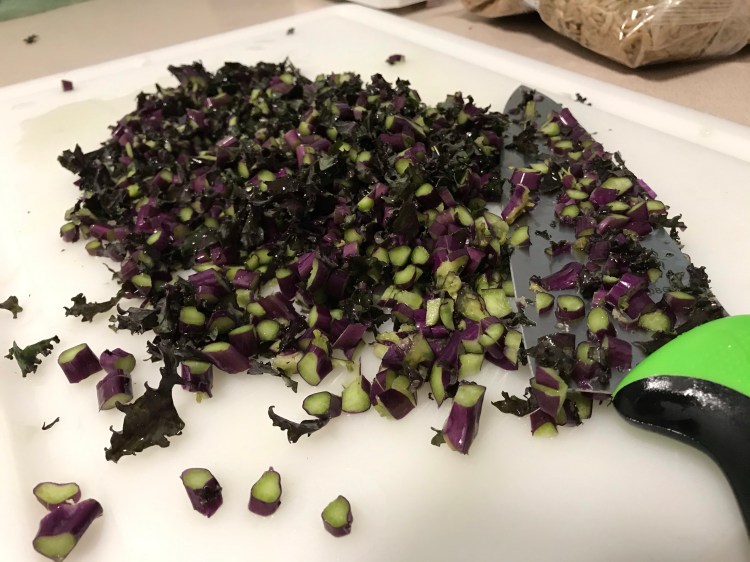
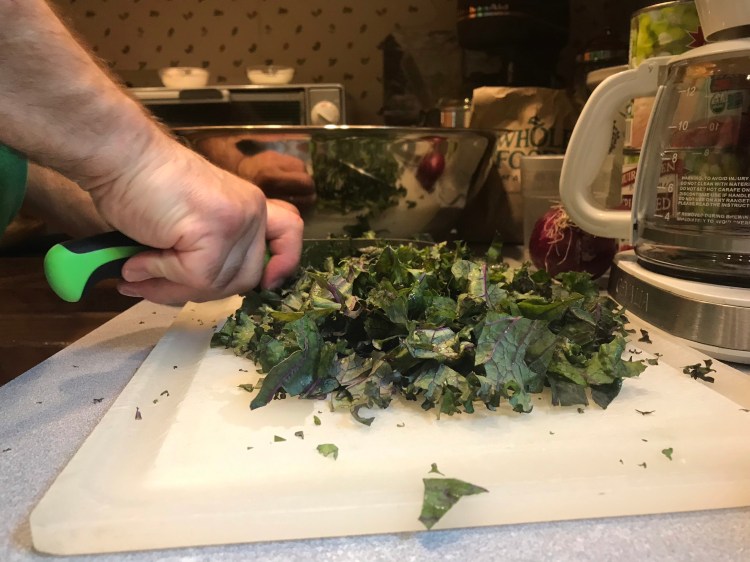
  • 6. Coarsely chop the kale leaves.
Massaging the Kale
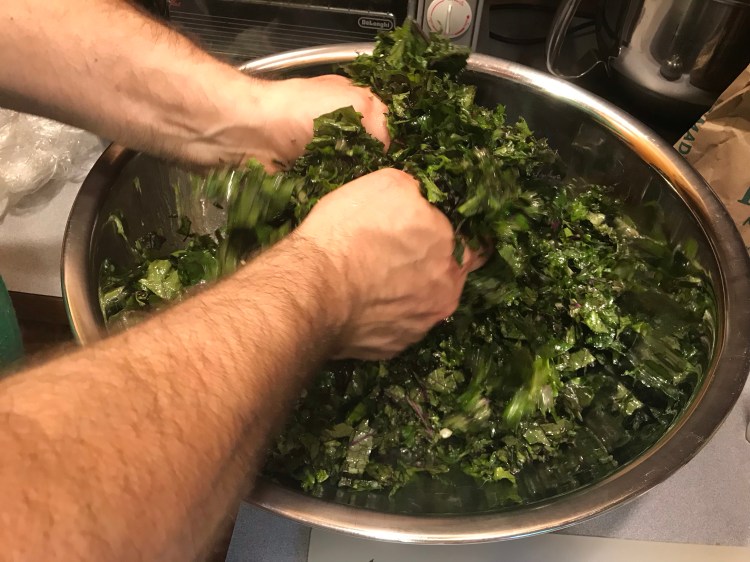
  • 7. In a large salad bowl, crush two cloves of garlic, add olive to cover, and a pinch of kosher salt.
  • 8. Add kale leaves to the bowl.
  • 9. Bruise the kale by grabbing the leaves with two hands, massaging the leaves with the oil and salt, for about a minute. The leaves should be conditioned and slightly wilted.
Combining the Rest of the Ingredients
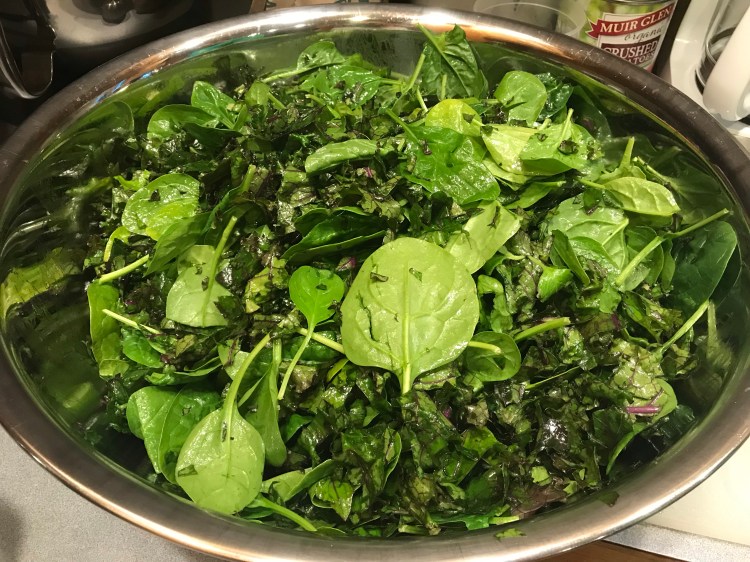
  • 10. Add the spinach to the kale and toss lightly, careful to not bruise the spinach
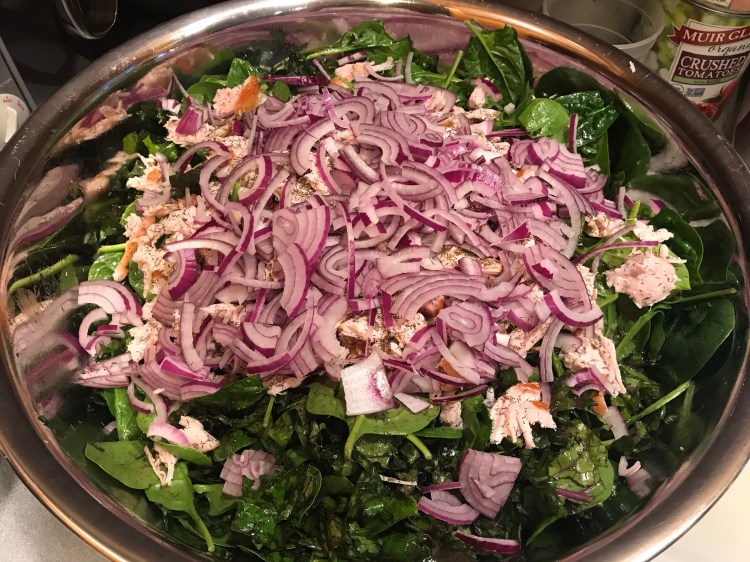
  • 11. Finely slice an onion and scatter it on top.
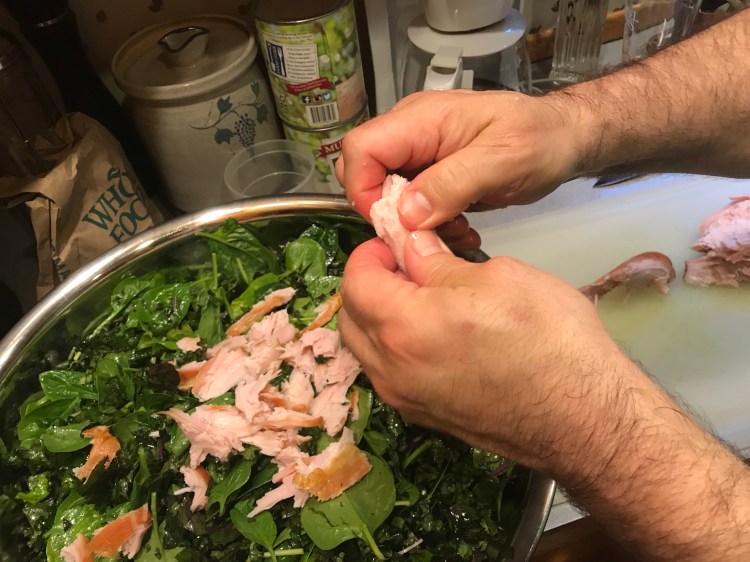
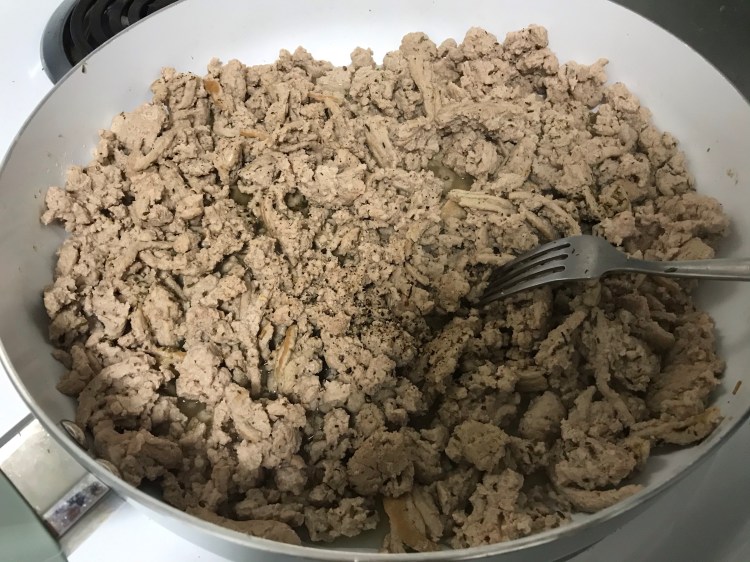
  • 12. Shred the smoked turkey, layering it on top of the onion.
  • 13. Season with dill and cracked pepper on top. Add a drizzle of olive oil.
  • 14. Squeeze the juice of two limes on top of the salad, with extra attention to coat the turkey with the juice.
  • 15. Toss lightly to mix.
  • 16. Chill for about 1-2 hours before serving.
  • 17. Add chickpeas on top after chilling and toss one more time.

Tips and Tricks

Since making this salad, my dad has learning a few tricks to make it even better than by just following the recipe.

  1. Before adding the garlic to the bowl with oil, crush the garlic and let it sit for 10 minutes before adding anything to it. This allows the garlic to reach its full nutrient-goodness potential and also get its flavor to the max.
  2. The preparation for this salad can take a while, so sometimes it is easier to prepare it over the course of two days instead of one. To do this, it is most efficient to roast the chickpeas, prepare the kale leaves, and massage them in the oil. This way the chickpeas cool over night and the kale leaves can chill, covered, in the refrigerator overnight as well. Chilling the kale leaves overnight will take out the need to re-chill the salad before serving because they will already be chilled after the warmth of your hands massaged them and made them warm.
  3. When my dad makes this salad, he makes a huge batch of it since my family loves it so much. This is the scaled down version to fit a normal sized salad bowl. However, if you want to make this for a large party, you can scale up the recipe x2. The only exception is for the turkey breast; instead of 2 small, look for a medium plus a small. The extra meat is good to have so it disperses well.

I hope that you give this salad a try! It is definitely a perfected and extremely enjoyable recipe by my dad. He loves to experiment with recipes and they don’t always turn out good, but when they do, they are one-of-a-kind.

Chickpea Tahini Cookies

Free from: milk, eggs, soy, nuts, and gluten

Okay, I have to be honest, I got this recipe from my sister. She really wanted to make a healthy-dessert snack that she could take on the go, and this is what she came up with!

My family went on a hiking trip last month, and I made a batch of these to snack on throughout the hike. They were not only delicious, but really great because of the amount of protein and carbohydrate they have in each bite. They also have only 2 Tbs of added sugar to the whole batch! Making them also a great dessert at night or to pack in kids’ lunches.

You may be thinking “eww chickpea and tahini?” but I swear you don’t even know those ingredients are in here.

Ingredients:

Cookies:
  • 2 cups of oats (blended into flour)
  • 2 cans of chickpeas (drained)
  • 2 scoops of protein powder
    • I used biochem vanilla but you can substitute whichever protein powder you like, or find one from this post I did on protein powder from a while ago.
  • 4 TBS of tahini
    • You can also make your own tahini if that is something you’d prefer, however I have yet to try that out.
  • 2 TBS of coconut oil
  • 2 TBS of brown sugar
  • 2 tsp of baking powder
  • 1 tsp of cinnamon (or as much as your heart desires, according to my sister)
  • 1 and a half tsp of vanilla extract
Mix-ins:

Obviously, you can use any of all these mix-ins in any combination you choose! I split my dough into three parts: one with just craisins, one with coconut flakes and chocolate chips, one with craisins and chocolate chips.

Personally, I liked the coconut flakes + chocolate chips the best.

Directions:

  1. Blend oats into flour. Then in a mixing bowl combine the oat flour, protein powder, baking powder, cinnamon and brown sugar.
  2. Next, in the blender combine the chickpeas with coconut oil. Blend on high until smooth, scrapping the edges in between.
  3. Add the tahini to the blended chickpeas and coconut oil. Blend on high.
  4. Add in the vanilla extract. Blend all the ingredients until there are no more chunks.

5. Add the blended mixture to the dry ingredients and thoroughly combine until it forms a dough.

6. Add in the mix-ins

Since I wanted to try a few different combinations, I split my dough into parts and then mixed-in the chips, flakes, and craisins separately. Make sure your mix-ins are well mixed! Every cookie should have some.

7. Scoop into small balls on a cookie sheet, spaced approximately an inch to an inch and half.
8. Bake in the oven at 375 for 20 minutes.

These cookies are a bit crumbly as dough, so don’t be nervous if they are difficult to form when you add in the mix-ins. When they bake, they will come together a little better. The baking process may take longer depending on how many cookies you fit on the sheet, so don’t hesitate to add or take away time if you think they are at the desired texture.

These cookies are really really tasty, and made with protein so feel free to eat the whole batch in one sitting. Enjoy!

Leftovers -> Tacos

I have a habit of finding leftovers in the refrigerator, mixing them with a few other items, and then transforming them into something completely new.

Well, maybe its less of a “habit” and more of a skill.

This past week, we had boneless chicken thighs, an open container of spinach and some washed kale all going bad in the refrigerator. I didn’t know what I wanted to eat for lunch today, but I figured it would be a good idea to use the chicken thighs and open spinach up. Except, I didn’t want just chicken or spinach.

So I got creative. We also had an open package of corn tortillas and some limes, so I decided: tacos!

Here is how I transformed my leftovers into tacos, but even if you don’t have all of the ingredients I had, as long as you have tortillas and limes, you can honestly make any kind of taco you please.

Ingredients:

  • Cooked (boiled or baked) chicken thighs
  • Spinach leaves
  • Kale leaves
  • Garlic
  • Limes
  • Corn tortillas
  • Sliced onions (I didn’t have these, but would’ve definitely used them if I did)
  • Your choice of taco sauce

Directions:

  1. First things first, shred the chicken. If you heat the chicken up in the microwave for a little bit before, sometimes it makes shredding it easier.
  2. After shredding the chicken, mix in your chosen taco sauce. I had some Sriracha that I have been really obsessed with lately, so I used that along with another brand of Taco Sauce from Sky Valley (featured below) that I also really like.
  3. Next, in a small frying pan, saute some garlic, oil, kale and spinach over high heat until wilted and a little bit crispy. I really like kale and spinach, so I added in enough to be able to use for my tacos and have on the side as well.
  1. Saute the shredded chicken with the taco sauce in a frying pan until heated through. Add some salt and pepper.
  2. Then, heat the tortillas on each side over high heat, about 1-2 minutes each side. Make sure they don’t overcooked and become hard.
  3. Finally, wash and slice a lime in half to squeeze over your tacos and greens!

Some other fun things you can add to your tacos if you have them on hand are tomatoes, cilantro, onions, peppers, steak, or hot peppers. Get creative, and use up those leftovers!

Overnight Oats

Free of dairy, peanuts, treenuts, soy, and coconut

I was skeptical of overnight oatmeal as it was becoming more popular! I really like my warm oatmeal that I make every morning and get to put the frozen berries. Lately though, it’s been warmer out and so having something refreshing in the morning, ready-to-go has been a nice switch-up!

The best part about overnight oatmeal is that you don’t have to worry about making it in the morning. That sounds like an oxymoron, but it is really one of my favorite parts. I get to just drink my coffee, grab my breakfast, and not worry about any preparation.

You can get really creative with your overnight oats. Just throw in anything you feel like having and let the oats soak up all the flavor. I’ll share with you my favorite combination:

Ingredients:

  • 1/2 cup of oats
  • 1/2 scoop of vanilla protein powder (Biochem brand)
  • 1 cup of water
  • Splash of Flaxseed Milk (optional)
  • Cinnamon
  • Blueberries
  • Half a banana sliced
  • Maple syrup
  • Spoon of Sunbutter (optional)

Directions:

  1. Boil water in a kettle or pot on the stove.
  2. In a bowl, mix together the oats with the protein powder.
  3. When the water is just to a boil, pour 1 cup over the oats.
  4. Stir until the oats become softened.
  5. Add in a splash of Flaxseed Milk and stir.
  6. Sprinkle some cinnamon in the oats.
  7. Stir in some blueberries (frozen or fresh).
  8. Slice up the banana and lay them on top of the oats. Drizzle a little bit of maple syrup over the top.
  9. Sprinkle with cinnamon.
  10. Cover and place the bowl in the refrigerator overnight.

The next morning, your oatmeal should fluffy and ready to go! All I add to it is a spoonful of Sunbutter to the top, which really compliments the banana and protein powder.

I hope you give this a try to your morning/nightly routine!

Crispy Apple Chips

Crispy Apple Chips

Free of dairy, eggs, peanuts, treenuts, soy, and coconut

It’s been awhile since I have posted! Finals season really had me occupied, but even if I wasn’t posting, I was still busy cooking.

A few months ago, my Nana sent me an email with recipe she had saved for apple chips. She said they were delicious and I had to try them, with just a few modifications. So I did!

I have to say, these were wicked tasty. Since being home in quarantine, it becomes really difficult to not eat everything in sight all the time. Having a snack like these that are healthy and delicious has been really helpful so that I make healthy snack choices when I go rummaging through my kitchen every few hours.

They take a couple hours in the oven, but they are worth the wait, so give them a try!

Ingredients:

  • 1 Tbs of sugar
  • 2 Tbs of cinnamon
  • 3 apples (Granny Smith work great if you like tartness, but otherwise Gala apples or Honey-crisp are good too)

Directions:

  1. Preheat the oven to 250 degrees.
  2. With the peels on, de-core, all 3 apples. If you don’t have an apple corer, scroll down for the modification.
  3. Slice each apple in thin rounds. I used my knife to slice each one, but if you have a mandolin, that makes the process go faster.
    1. The slices should be thin, but the goal is really to make them as uniform as possible. That will help with the baking process so that you don’t get some burnt slices.
    2. I actually found that the slices that were a little thicker were better because they had more a bite to them.

3. Combine the sugar and cinnamon and whisk together.

4. Pour the cinnamon sugar mixture over the apple slices and toss to coat thoroughly.

5. Lay the slices flat on two baking sheets and place them in the oven for 2 hours.

Tips and Modifications

  • If you don’t have an apple corer, slice the apples in quarters and de-core them the traditional way. Instead of slicing the apples in rounds, you will make half-slices.
  • Turn the oven on convect to get them to really crisp up, but then lower the temperature to 200 and keep a good idea on them after the first hour and half.
  • They take a long time in the oven, but make sure that they don’t burn! Once they burn, they won’t be nearly as good.

Enjoy!

Raspberry Jam Bars

Free from milk, eggs, peanuts, treenuts, soy, and coconut

These raspberry jam bars are my absolute, biggest guilty-pleasure dessert! They are so addicting — I can never just have one.

I use to make these to bring to my high school’s Dessert Theater productions, where all cast members were required to bring a dessert to serve our guests. With a busy schedule, I could always plan to bake these the night before the show or even the day of and they would always be a big hit at Dessert Theater.

Because they stick together so well and are small enough for easy transportation, they make the perfect dessert to bring with you to any party. I especially liked them for school events since they were allergy-friendly, so the majority of people could enjoy them.

Ingredients:

  • 1 1/2 cups of margarine, melted (I use Fleischmann’s brand margarine sticks)
  • 2 1/2 cups of oats
  • 2 1/2 cups of flour
  • 1 cup of brown sugar
  • 2 tsp of baking powder
  • 1/2 tsp of salt
  • 1 jar of raspberry preserves

Directions:

  1. Preheat the oven to 350 degrees.
  2. In a medium mixing bowl, combine the dry ingredients (oats, flour, brown sugar, baking powder, and salt) and whisk together.
  3. Melt the margarine in the microwave (about 1-2 minutes). Pour the melted margarine over the dry ingredients and thoroughly combine the dry ingredients with the margarine.
    1. Sometimes at this stage, I like to try a piece of the crumble. You know, just to — uhh —make sure it tastes alright…

4. Take about half of the oat crumble and spread it evenly across the bottom of a 13×9 inch baking dish. The layer should be about 1/4 inch thick.

5. Bake in the oven for 10 minutes.

6. After the bottom has finished baking, spread a layer of raspberry preserves across the top of it (you should use a little over half of an 18 oz jar).
7. Use the remaining crumble and sprinkle it over the top of the jam.
8. Place back in the oven for 30-35 minutes (until the top is golden-brown).
9. Wait to cool and slice into squares.

Chicken With Cauliflower Rice

Making the most out of frozen foods.

Using fresh ingredients is always preferred, but unfortunately that isn’t always available to me. Especially with the current situation, having a storage of frozen vegetables and meat can be really useful when you know you won’t be able to get to the store in quite some time.

All of the main ingredients in this meal were previously frozen and the rest are all non-perishables. I highly recommend having these few ingredients on hand because they are all extremely versatile and work great when you’re in a time crunch.

Ingredients:

  1. 1-2 lbs of boneless chicken breast
  2. 1 – 16 oz bag of frozen broccoli florets
  3. 2 – 12 oz bags of frozen cauliflower rice
  4. 3 Tbs of Dijon mustard
  5. 2 Tbs of smoked paprika
  6. Pinch of salt
  7. Cracked black pepper
  8. Cumin
  9. Minced garlic (fresh or dry)
  10. Olive oil

How to Defrost:

The frozen vegetables defrost when you cook them, frozen chicken breast requires more attention to the defrosting process.

Defrosting Options:
  1. The best way to defrost chicken breast would be to plan at least a day in advance by taking the chicken out of the freezer and placing it in the refrigerator to thaw out overnight.
  2. If you missed the mark on placing the chicken in the refrigerator a day in advance, no worries. The next best thing you can do is to run the chicken under warm water to defrost it from the outside-in.
  3. Another option is to leave it out on the counter the day of to defrost, and then place it back in the refrigerator a few hours later. If the chicken if well-sealed then letting it sit out on the counter for a few hours won’t be hurtful, but be mindful that if the chicken reaches between temperatures 40 to 140 degrees F, then it is within the optimal range for growing bacteria.

Directions:

  1. In a small bowl, mixed together the Dijon mustard, paprika, salt, and pepper.
  2. Chop the chicken into pieces, relatively bite-sized.
  3. Pour the mustard-mixture over the chicken and coat the chicken thoroughly. Refrigerate for 1 hour or overnight.
  4. After the chicken has finished marinading, place the chicken in a skillet over high heat.
  5. Cover the chicken and let it cook while making the cauliflower rice.
  1. In a saute or frying pan, add olive oil to the pan over high heat.
  2. Add in the minced garlic and stir well.
  3. Just before the garlic turns brown, add in the bags of cauliflower rice.
  4. When the rice begins to soften (about 3 minutes), add in the frozen broccoli to the mix.

5. Cook the cauliflower rice and broccoli for about 10 minutes (they should be soft but not mushy).

6. Season with salt, pepper, coriander, and cumin.

Serve the chicken on top of the rice or mix it all in one. Enjoy!

Green Immunity Juice

Okay! So this is a very important post, especially for right now, but in general it’s a great remedy to learn whenever you’re feeling under the weather.

When I am having a busy week and I know I am feeling run down, I often rely on this smoothie to provide me with all the micronutrients I need to boost my immune system. It works like a charm.

It’s my go-to for when I can feel a cold coming on.

So I think it’s the perfect recipe to share with all of you to keep your immune systems in check as we all try to protect ourselves during this time.

There’s very few ingredients, but they are each incredibly vital.

Ingredients:

  • 1-2 green apples
  • 2 pieces of celery
  • 1 whole lime (peeled)
  • 1-2 cups of frozen kale and spinach

Directions:

  1. Chop the apple in quarters and remove the stems.
  2. Place all the ingredients in the blender in the order listed under ingredients.
  3. Blend on high, stopping to scrape the sides when necessary.
  4. If it isn’t blending well, add in a splash of water or apple/cranberry juice to help liquify it.
    1. I prefer to stay away from all added sugars when I’m sick or feel a cold coming on because viruses feed off of sugar, but if water makes it too—well—watery for you, then a little splash of apple juice won’t hurt anyone.

Pour your pretty green juice into a glass with a straw and enjoy! It’s perfect for on the go and stores well in the refrigerator if you want to make it in advance.

Nana’s Chicken

Free of dairy, peanuts, treenuts, soy, coconut, eggs, and gluten

This recipe is a tribute to my Nana, who somehow manages to make the simplest of meals taste unbelievable.

She made this chicken thighs recipe for us once, and even though I was initially hoping to have steak, after taking a bite, I completely forgot about the steak I had wanted originally.

I was surprised to learn that her recipe is not only delicious, but really simple to make. You can also prep all the ingredients together and then freeze it to have for dinner during a busy week.

So without further ado, here is my Nana’s recipe:

Ingredients:

  • 1/2 cup of honey
  • 2 Tbs of dijon mustard
  • 2 pinches of salt
  • 1 tsp of curry powder
  • 3 Tbs of olive oil
  • About 8-10 chicken thighs (either with or without bones)

Directions:

  1. Preheat the oven to 375.
  2. In a measuring cup, pour in 1/2 cup of honey.
  3. Then to the honey, add in the salt, mustard, curry, and olive oil.
  4. Stir to combine.

5. Spray a baking sheet with non-stick spray, or line with parchment paper (this is to make the clean up easier).
a. I prefer to use a larger baking sheet that gives the chicken plenty of space, especially if the chicken has bones and skin.
6. Pour the honey mixture over the chicken thighs and coat each one thoroughly.
7. Bake in the oven at 375 for 45-60 min, flipping halfway.

Tips and Tricks:

  • If you have bone-in chicken thighs, I found that removing the skin allows for more flavor to stick to the chicken and it comes out better.
  • In you prep the chicken with the marinade in advance, you can refrigerate it for 3 hours or up to 2-3 days to let the marinade soak in.
  • Freeze the chicken thighs in the honey mixture for a meal later in the week.
  • Substitute melted margarine (or butter if not dairy free) for olive oil to bring a richer flavor to the chicken.
  • For the last 15 minutes of cook time, turn the oven to convection in order to crisp up the chicken thighs.

Enjoy!

Kale & Broccoli Pesto

Free of dairy, peanuts, treenuts, soy, eggs, coconut, and gluten

Pesto traditionally has pine nuts and cheese in it, making it unsafe for anyone with a nut or dairy allergy. I had only heard good things about pesto though, so I wanted to try it for myself. Looking into a few other recipes that removed the nuts and cheese from pesto and substituted them in different ways, my sister and I found a way to create pesto dairy and nut free, that is also packed with vitamins and minerals from added kale and broccoli.

The recipe I made combined the dairy-nut free pesto sauce with ground turkey and lentil pasta for a delicious meal. Instead of lentil pasta, you can also use spaghetti squash, which I actually prefer. Here is the link to how to make spaghetti squash.

Everything You Need

  • Pesto
    • 1 head of red or green kale
    • 4 oz of fresh basil
    • 1 medium head of broccoli (steamed)
    • 3 Tbs of sunbutter
    • 1 Tbs of olive oil
    • 1 clove of garlic
    • 1 lemon
    • Splash of water until desired consistency
    • Salt
  • 1 lbs of ground turkey
  • Box of pasta or pasta alternative
  • Garlic powder
  • Salt
  • Pepper
  • Thyme
  • Oregano

Directions:

  1. Separate the kale leaves from the stems (don’t throw either away)
    1. Separate them by sliding your hand down the kale stem, against the leaves, to gently pull them off
  2. Wash the kale leaves
  3. Chop them coarsely
  1. Rinse the kale stems
  2. Chop them finely

**The stems hold a lot of nutrients and fiber, and they work really well in the pesto. I also like to save them to add to salads, sautes, or sauces.

  1. In a strong blender, combine the garlic clove, a splash of water, olive oil, steamed broccoli, and kale stems/leaves (you may not need all of the kale leaves).
  2. Blend on high until mostly pureed.
  3. Then, add in the sunbutter, lemon juice, and basil.
  4. Blend on high, pausing to scrape sides when necessary.
  5. Continue to add in water until pesto can reach a paste consistency. (If it becomes too watery, then play with adding in more sunbutter).
  1. Boil water for the pasta, add in pasta once boiling.
  1. While the water is boiling, begin to cook the ground turkey: In a large pan over high heat, pour in some olive oil, and add in the ground turkey.
  2. Break up the turkey and add in some water to the pan help break it up.
  3. Season with salt, pepper, garlic powder, oregano, and thyme.
  1. Combine all the ingredients together in the pan and toss together, then serve.

I hope you try this recipe and enjoy it as much as I did!

Design a site like this with WordPress.com
Get started